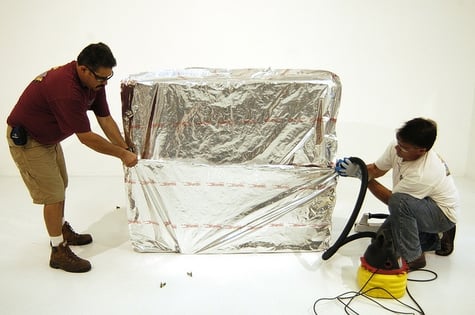
Oh no, your air evacuated barrier bag has been torn! Don't worry you may be able to repair the tear and not require a whole new bag. Let's break down the steps you will need to take to repair your ripped barrier bag.

Desiccant
Since the barrier bag material has been breached we must assume that the desiccant has done its job and... absorbed all the moisture and is no longer active.
Check with your packaging company about how much desiccant is required for your size crate. Then you will need to replicate that quantity inside the package before sealing it up. We suggest you place the replacement desiccant in multiple locations inside the package for better efficacy.
Repairing the Tear
Materials you will need
- Purchase enough bag material to account for the rip and little extra for good measure.
- You will also need tape designed to adhere permanently to the barrier bag material.
- Vacuum with hose
3 Step Repair
#1 (option a) Go to the location(s) where the bag is torn, try to pull the material together. Then tape the tear together with the tape. Its okay to tape directly to the product's base. This will seal it up. (option b) If you are unable to pull the material together then take the extra bag material and cut a patch sized piece and place it over the tear and tape around that until it looks sealed up.
#2 Go to a location where the bag is not damaged. Apply some tape, then slit the tape (and the bag) in a straight line. This "cutting the tape" method reinforces the cut and ensure the bag won’t tear further.
#3 Insert a vacuum hose and suck all the air out. The bag should draw up nicely, but may relax over time, which is normal. Once all the air is out use the tape to seal up the vacuum hole.
Note: Keep in mind that there may be more than one tear. When vacuuming the air out if the bag seems to be somewhat "saggy" that may indicate the patches need more attention, or possibly there is another tear you don’t see.
Need more help? Click the button below


